

Practical information about your STATIM sterilizer
Statim G4 & Classic 2000, 5000, 7000, & 900 (Stattoo)
These details and suggested practices should help you better understand and streamline your workflow for Body Artists
Contents
- Working with a STATIM autoclave
- Steam Sterilizer Sizes and Process Types according to norms B/S/N
- You B the judge
- Important facts about small sterilizers
- Transitioning to a STATIM autoclave
- Important work practices for a busy studio
- Optimize placement of the STATIM for maximum value
- Reprocessing instruments with a STATIM
- Proper use of a Statim autoclave for body art procedures
- STATIM in the old APP Procedure Manual
- How to safely maintain a STATIM
- STATIM Instrument Processing Suite
- Cleaning
- Anodizer (SMT Micro)
- Water distiller (AquaStat)
- Enzyme precleaner
- HYDRIM automated instrument washer
- Sterilization
- STATIM Autoclaves
- Questions and Answers
Working with a STATIM autoclave
Effective infection control, instrument management and sterilization practices
Brian Skellie Piercer / Infection Prevention Specialist / Founder of Piercing Experience est 1992
Member APP, AAMI & ASTM, and independent SciCan dealer www.statim.us
Brian introduced these autoclaves to our industry in the 1990’s, and hundreds of professionals have come to work with them over the years. Statim autoclaves have fully validated fast sterilization cycles, which makes them ideal for sterilizing jewelry and all the items as needed for each piercing as well as the routine wrapped items every studio needs. In this class we will explore how they should be handled in our daily routine.
Meeting Standards for Effective Autoclaves
Soon all autoclaves for body art will be required to have active air removal Class B or Class S cycles with closed chamber filtered air drying for hollow and porous loads, as well as built in record keeping devices, whether it be a storage device, network connection or printer. This could become enforced within the next five to ten years in North America. The Association of Professional Piercers has adapted these requirements for membership, which will take effect July 10th, 2024.
The STATIM autoclave system is a general purpose autoclave sterilizer,
Regulatory information
not a “flash sterilizer”
Steam Sterilizer Sizes and Process Types according to norms B/S/N
From 3M “Sterile E Online Network Tutorials”:
Background
In daily practice we encounter many sizes of steam sterilizers. In the norms 2 sizes are defined: Small steam Sterilizers and Big Steam Sterilizers (EN 13060, ISO 17665). The processes programmed in the steam are split up in 3 types: B, N and S are defined.
Key Learnings
- Differences between small and big steam sterilizers
- Differences between the Type B, S, and N processes
Steam sterilizers defined:
A Small Steam Sterilizer is a steam sterilizer which is unable to accommodate a sterilization module and has a chamber volume not exceeding 60 litres (EN 13060, clause 3.34).
The volume of 60 litres is based on a standard sterilization module: rectangular parallel piped (square bar) of dimensions 300 mm (height) × 600 mm (length) x 300 mm (width) (EN285, clause 3.33). If the volume of a standard module is calculated it is 54 litres. Of course, a package positioned in a steam sterilizer has to have space in the sterilizer. This is the reason why 6 litres are added to the volume of a small sterilizer and became 60 litres.
A big steam sterilizer is a sterilizer with a loadable space bigger as defined for a small steam sterilizer.
Steam Sterilization Process types
In the norms define and classify 3 different process types, regardless the size of the steam sterilizer. The types are type B, type S, and Type N (EN 13060).
Type B process: The sterilization of all wrapped or non-wrapped, solid, hollow load products type and porous products as represented by the test loads in the EN 13060 is possible.
Type S process: The sterilization of products as specified by the manufacturer of the sterilizer including non wrapped solid products and at least one of the following: porous products, small porous items, hollow load products type A, hollow load products B, single wrapped products, multiple-layer wrapped products, is possible.
Type N process: The sterilization of non wrapped solid products is possible.
Add B: The letter ‘B’ stands for ‘Big’ from ‘Big’ sterilizers. In the process of writing the EN 13060 it was assumed that in Big Sterilizers all medical devices, e.g. wrapped, none wrapped, hollow, none hollow, porous and none porous, can be sterilized in a big sterilizer. Of course, one has to realize that the load that to be sterilized is determining the minimum requirements for the process to be used. In Big sterilizers, it is possible to have type S or type N processes, e.g. for water like medicines in closed containers it is necessary to have special (type S) process.
Add S: The letter ‘S’ stands for Special, from ‘Special’ or ‘Specified’ products. In these sterilizers the manufacturer of the sterilizer has to specify what can and cannot be sterilized in this type S process.
Add N: The letter ‘N’ stands for ‘None’, from none wrapped and none hollow. These sterilizers cannot sterilize wrapped product. Consequently, the products sterilized have to be used immediately, or NOT regarded as sterilized but as disinfected.
Summary
Depending on the sort load to be sterilized a process can be chosen. Depending on the load and the amount items to be sterilized a size of the steam sterilizer can be chosen. It is of importance that the sterilizer, its process, the load, the loading pattern and its wrapping is aligned with each other.
| Hollow A: | Hollow B: | Non Hollow: |
|---|---|---|
| Cavity Length to Diameter Ratio is >5 | Cavity Length to Diameter Ratio is >1 & <5 | Cavity Length to Diameter Ratio is < 1 |
 |  |  |
| As described in EN 13060 |
For more information on Steam Sterilizers
- EN 285, ISO 17665,
- EN 13060,
- Sterilization of dental instruments, J.P.C.M. van Doornmalen, M. Verschueren, J. Dankert, A.G.M. Rietmeijer, NTVT July 2001; 108: 269-272
- WHO Sterilization 2016
You B the judge
In North America SciCan provides autoclaves that have been tested, proven and validated by North American standards as Class II medical devices.
Regulated by FDA in the USA and TPD (Therapeutic Products Directorate) in Canada, STATIM autoclaves have been cleared by the FDA for example under four 510(K) submissions, (K910241, K915054, K962179, K983679). These submissions are supported by performance tests validated by 3rd party testing including dental handpiece sterilization.
Recently some issues have been raised about the provisions of a European standard EN13060 for small steam sterilizers and the relevance of the B cycle to North America.
As a major manufacturer of small steam sterilizers for both Europe and North America, SciCan would like to provide some background and we hope dispel much of the confusion that may have been sown.
Important facts about small sterilizers
- SciCan is represented on the European working group that sets the standard for small steam sterilizers.
- The removal of air has long been recognized as being critical to achieving sterilization. The standard in Europe is that autoclaves must remove the air prior to sterilization to achieve sterilization of various loads, including hollow instruments (e.g. dental handpieces, needles, receiving tubes, barbells, tattoo tubes).
- The Europeans recognize that there is more than one way to achieve the removal of air. The standard recognizes both B cycle (pre-vacuum) and STATIM’s S cycle as doing so.
- STATIM validates its’ successful cycle. A computerized microprocessor aborts the cycle if either of the parameters of temperature or time are not achieved. By following the operating instructions, you are assured of sterilization with every cycle.
- In North America all sterilization cycles have to be validated microbiologically [with a spore test], including the B cycle, and the final word on that belongs to FDA and TPD in Canada.
In 1989 SciCan first saw the need to provide a reliable, fast, gentle method of sterilizing dental handpieces. SciCan’s R&D department developed a radically different steam autoclave, SciCan’s unique STATIM Cassette Autoclave. Since the beginning SciCan has submitted STATIM to review by numerous independent testing facilities to validate our claims. Here are some of the institutions conducting the tests, all of which are available as published reports validating sterilization of dental handpieces or other lumens.
- 1991 University Hospital, London, Ontario, Canada
- 1991 University of Liverpool, Liverpool, England
- 1992 University Hospital, London, Ontario, Canada
- 1992 USAF Dental Investigation Service, Brookes AFB, USA
- 1992 Keil University, Keil, Germany
- 1992 Institute für Medixinische Mikrobiologie, Munich, Germany
- 1992 Institute Pasteur, Paris, France
- 1993 Lunds Universitet, Malmö, Sweden
- 1997 The National Institute of Public Health and the Environment, the Netherlands**
- 1998 Indiana University, School of Dentistry, Indianapolis, Indiana
- 2001 Indiana University, School of Dentistry, Indianapolis, Indiana†
- 2002 Indiana University, School of Dentistry, Indianapolis, Indiana
- 2003 Indiana University, School of Dentistry, Indianapolis, Indiana
- 2004 Indiana University, School of Dentistry, Indianapolis, Indiana
- 2005 Indiana University, School of Dentistry, Indianapolis, Indiana
* British Dental Association “advice sheet A12 infection control in dentistry “
** This certified STATIM as the only S cycle autoclave that met the then European standard CEN TC102 WG5 document N283.
† Tests on ophthalmic phaco handpieces
SciCan’s R & D and Regulatory departments will continue to monitor and ensure SciCan products continue to meet any standards that exist or will be set in the future.
Transitioning to a STATIM autoclave
Important work practices for a busy studio
Start by using the STATIM by sterilizing items just as you would in any other autoclave. Many studios reprocess instruments in a central service area by a trained and qualified responsible person. In this case:
- Process (wash, rinse, dry and inspect) your instruments according to the recommended protocol.
- Loosely pack instruments in the bags to allow steam penetration to all instrument surfaces.
- Require that only a trained person load and operate the STATIM autoclave.
- Familiarize yourself with the functions of the wrapped cycle and the air dry cycle.
- Get an idea of how quickly your common loads will dry by stopping the dry cycle at five minute intervals to check for dryness with test loads.
- Remove wrapped items only when completely dry
Optimize placement of the STATIM for maximum value
- The STATIM 2000 and 5000s model are best located outside of the procedure area, in a separate clean staging area to allow access by the sales staff and continued use during procedures.
- The STATIM 900 is meant to be in the procedure area for immediate use of its contents.
- When located in the procedure area, the Statim should not be used for reprocessing instruments, unless used in conjunction with a Hydrim automated instrument washer.
Reprocessing instruments with a STATIM
I suggest that you refer to the AORN Standards and Recommended practices for instrument decontamination and compare it to Berry & Kohn’s Operating Room Technique for a broader understanding.
A written workflow for your studio setup, along with a diagram and pictures is helpful.
Instrument reprocessing setup: containers, an ultrasonic cleaner and STATIM
I suggest a cellular layout, preferably enclosed in a cabinet with doors and a extraction vent hood to reduce noise and contamination:
- Staging / Inspection area
- Storage for indicators and packaging supplies above, and for chemicals below sink
- Ultrasonic with a sealed lid and built in drain pump in between this area and the sink
- Deep sink for rinsing and hand scrubbing dirty items only [no hand washing]
- Packaging / Inspection area including a magnifying lamp of at least 10X or microscope of 40X or greater to detect residues or defects
- Separate clean area:
- Sink for hand washing only
- Storage for clean personal protective equipment nearby
- STATIM and waste bottle below or VistaCool condenser connected direct to drain.
Note: Even though it can be disinfected, make a habit to never cross contaminate the exterior surfaces of your STATIM and cassette or any other autoclave.
Simpler instrument reprocessing setup: containers, HYDRIM washer and STATIM
A single cabinet can house both washer and sterilizer units shown at https://statim.us/news/cleaning-news/equipment/:

Sterilization organization tower with sterile storage
Bottom to top:
- Separate clean area above
- Clean storage above
- Large chamber autoclave (Bravo17)
- Sterilizer (STATIM 2000)
- Slide out tray as Packaging / Inspection area
- Washer (HYDRIM)
- Chemical storage below
- Waste bottle in back

Proper use of a Statim autoclave for body art procedures
Wrapped and unwrapped techniques
Protocol for wrapped instruments
- Put on gloves
- Apply Stat-Dri to the interior surfaces of the cassette to shorten drying time.
- Put the cleaned, pouched instruments in the STATIM cassette
- Place the instruments into autoclave bags according to the manufacturer’s instructions.
- Orient the instrument rack in the cassette to ensure that wrapped instruments rest approximately 6 mm / 0.25″ above the cassette base.
- Place the wrapped instruments on the rack and arrange them to avoid overlap.
- Ensure that all wrapped loads are dry before handling and /or storage to maintain sterility.
- *The use of cloth wraps in the Statim is not recommended. SciCan recommends the use of plastic / paper autoclave bags such as SPS™, Medi-Plus™ and Chex All II™. Steri-Stik™ paper / paper autoclave bags may also be used. — SciCan
- Remove gloves
- Wash or clean hands with approved hand sanitizer
- Close cassette with clean hands
- Put the cassette in the sterilizer
- Press the wrapped [X] button
- Press the start <|> button
- Come back later when packs are dry [20-30 minutes or longer depending on the load]
- Press stop button
- Remove cassette and place on top of STATIM or other insulated work surface
- Open cassette and check contents for dryness
Ensure that all wrapped loads are dry before handling and /or storage to maintain sterility.
- If dry: store equipment in a clean, dry airtight container
- If wet:
- Close cassette
- Reinsert cassette into STATIM
- Run another wrapped cycle
- Allow the full air dry cycle to run until it is finished
- Repeat step 12 above.
Unwrapped sterilization (with containers)
Sterilization containers such as the SysTM Stainless Steel Cassette Organizers and Surgical Plastic Trays are shown on https://statim.us/sterilization/statim/systm/.
- Use containers made for sterilization to collect, transport, clean and sterilize instruments
- There are plastic and metal versions available and each has its advantages:

- Plastic: Surgical sterilization trays
- Are the most affordable
- Deeper to fit larger items
- Different sizes available: eg. Two small fit per cassette load or one large is the full size
- Can be used to keep sets of items together through processing
- Organize tapers and other smaller instruments for automated washing
- Work in ultrasonic and HYDRIM washers

- Metal:SysTM cassette organizers
- Are the most durable
- Fastest drying
- Different sizes to fit many items
- Four SysTM3 fit per cassette load or one full size 4B
- Work in ultrasonic and very well in HYDRIM washers

- For maximum volume in a busy studio, take advantage of the removable cassette system
- One additional STATIM cassette chamber per work station.
- At least two organizer containers per artist. (Two active stations = three total cassettes and four total containers)
Aseptic transport for equipment
The sealed cassette will maintain instruments in a sterile condition for up to an hour, and allow safe transport from point of process to your procedure area. Multiple procedures can be run simultaneously in sterilization containers.
I sterilize what we need for a procedure in either the metal or plastic tray, and deliver it to the freshly disinfected work surface (such as a counter, tray or on top of the STATIM itself) inside the cassette.
Use the cassette and containers as a sterile field
The tray of the cassette nests inside the lid. This functions both for insulation to prevent warping, and also as a compact sterile field that can fit on a Mayo stand or on top of the STATIM itself (use a StatMat or other insulating cover to protect the unit)

- Open the cassette
- Place the lid upturned on the work surface, eliminating the need for any other sterile field
- Set the tray inside the lid [they are made to fit this way, too]
- Either work out of the cassette, or out of the containers in terms of preference.
- When I choose to set up just one procedure, I’ll still use the SysTM or Small Surgical tray to contain my jewelry and needle inside a piece of gauze, and prep items such as gauze or swabs (and prep gloves if I choose).
- If I set up for multiple procedures, I will use up to four SysTM trays to organize, and aseptically remove only the one that I need at the point of use, leaving the others inside the cassette.
- If I place one of either type of containers on a work surface, I make sure that it is loaded in a way to prevent strike-through from the surface it is set upon, and that it will not spill its contents.
- Both types have small feet to keep their contents aseptically above a work surface.
- A single layer of CSR wrap can be sealed around each of the organizers to keep separate and provide a sterile field if desired when sterilizing 2 or more at a time.
- Items to be reprocessed should be wiped off with gauze and put back into the organizer as you work, then and transported on a tray or in the cassette to your ultrasonic or HYDRIM cleaner.
- These organizers are designed to be processed through an ultrasonic or HYDRIM cleaner effectively, and to prevent worker injury this way.
- Inspect the instruments before sterilization.
- The organizers can be used to safely store and keep together sets of unwrapped instruments that have been cleaned and sterilized.
- If a prepared pack is desired, seal in a pouch or CSR wrap with an integrator and autoclave tape and process on a wrapped cycle for storage.
- If you sterilize the organizers full of instruments unwrapped, they can be safely stored until the next client, then sterilized with the jewelry and other items.
- You can place unwrapped containers in the STATIM cassette for storage.
- Keep STATIM cassettes closed at all times when not in use to avoid dust and damage to the seal.
STATIM in the old APP Procedure Manual

In the 2013 edition of the APP Procedure Manual, I helped correct the previously confusing references to Statim autoclaves. The following is to clarify the inconsistencies in the previous editions: Read more
The wrong impression?
Dispelling common misunderstandings in regards to the use and purpose of the Statim autoclave sterilizer family will help simplify our jobs as body artists and the regulatory work of Health Officials. To clarify, a definitive explanation of basic appropriate Statim sterilizer usage follows.
Important sterilization facts
- Effective sterilization requires that all instruments are pre-cleaned and inspected prior to sterilization by sealed, validated ultrasonic or automated washer process such as the Hydrim.
- Instruments should always be sterilized prior to use or storage, and handled with gloves whether wrapped or unwrapped.
- Statim autoclaves are all designed to sterilize previously contaminated instruments, whether hollow, porous, solid or mixed loads as needed for procedures in as short as 6 minutes unwrapped, 10 minutes wrapped.
- Statim autoclaves are all suitable for use as a sole or primary means of sterilization; If a Statim is used for sterilization, then no other autoclave is needed.
- Statim autoclaves can all sterilize and dry bulk loose instruments or cassette organizers unwrapped for terminal decontamination and clean (non-sterile) storage.
- Statim autoclaves can all sterilize and dry as needed such instruments selected from clean non-sterile storage.
- Statim models 2000, 5000 and 7000 can all be used to sterilize wrapped equipment in a sealed sterile barrier system such as an autoclave pouch or CSR wrap to be stored for sterility maintenance until needed.
- All autoclaves should be installed and handled to avoid contamination of their exteriors.
- All autoclaves must be cleaned and maintained according to the manufacturer recommendations.
- Statim cassettes can be cleaned and disinfected or even sterilized in a larger autoclave if contaminated.
- All autoclaves must be biologically (spore) tested and otherwise validated according to the manufacturer instructions for use and legal requirements.
- Statim autoclaves can all self-diagnose any fault in the sterilization cycle for easy maintenance in the field, and most can be corrected without a technician.
How to safely maintain a STATIM
Regular operator maintenance
Refer to the latest Operator Manual for regular cleaning, seal and filter replacement advice. Download at statim.us/info/downloads.
Yearly technician maintenance
Chart in the latest Operator Manual.
Validation
Methods of verification that your sterilizer is functioning differ regionally. The UK is one of the strictest examples, and requires technician evaluation every three months for small sterilizers.
“It would be just as well to have dental technicians specially trained by the industry, to carry out an annual calibration as part of general maintenance. The user of the sterilizer should be supplied with a written report of the maintenance and calibration procedures and settings.”
“Section 7.1 of the new EN13060 standard for small steam sterilizers pays particular attention to this phenomenon. The principle of supra-atmospheric pressure changes is also used in some larger sterilizers in order to provide a number of quicker programmes. For the standard, this principle comes under the ‘S’ of Special. This means that the manufacturer is required to both indicate and demonstrate the sterilisation process for which it is suitable, which in this case entails all kinds of solid and hollow instruments.”
Henk Becker is a member of the ‘Sterilisation and Sterility’ committee which functions under the auspices of the NEN, Nederlands Normalisatie Instituut (Dutch Standards Organisation), to promote recommendations and regulations in the field of sterilisation and sterility, both in hospital-based as well as in primary health care. Becker is likewise a member of TC102-WG5, the European working group tasked with bringing about EN13060, the new standard for small steam sterilizers. He has wide experience of working in a dental health care setting.
STATIM Instrument Processing Suite

Cleaning
Almost all instruments have single use disposable options that can be sterilized in the STATIM autoclave. You can get plastic and metal disposable versions of tubes, tapers, hemostats and more for a reasonable price. I highly recommend this route to avoid the safety hazards involved with manual and ultrasonic equipment reprocessing.
A jewelry steamer, ultrasonic exclusively for new jewelry, and an anodizer would offer three steps in order to render surfaces for jewelry clean enough for initial healing. I consider the ultrasonic optional if you electroclean with the anodizer.
Anodizer
- Use electricity in an alkaline solution to clean and passivate your Ti and Nb jewelry more thoroughly than an ultrasonic, as described in ASTM standards F2791 and F86.
- Create precise oxide colors for Ti and Nb jewelry with out dye or pigment, and recolor customer jewelry with a disposable cup and electrodes.
- More information at statim.us/anodizer and metal working supplies at www.reactivemetals.com
Water distiller (AquaStat)
- The need for ultra-pure water for any autoclave means either buying distilled water, or making it yourself.
- This energy efficient, compact table-top water distiller makes one gallon (3.8L) in about four hours without any need for extra plumbing or filters.
- One gallon is enough water to run up to 40 cycles.
- Cleaner and safer than Reverse Osmosis for your autoclave and even for drinking water.
Enzyme precleaner (ERGO All-in-one)
- Prevents foreign matter (blood, ink, OPIM) from drying and denaturing on instruments.
- Foam suggested (Liquid diluted 0.25 to 0.5oz / gal can be used for soak, scrub and ultrasonic bath.)
Ultrasonic cleaner (StatClean)
For the StatClean operation, here is what I do:
First fill with Optim 28 ready to use, or with tap water and the UPS All-in-ONE solution (0.25 oz to a gallon).
Next, cover and activate the outgassing function to remove dissolved air from the solution.
Then instruments maybe be loaded directly to soak in the unit.
Cassette organizers filled with used instruments may be loaded instead of loose instruments for more efficient organization and to keep kits together
When you are ready to run the cleaning program, 5 to 10 minutes should be enough for loose instruments 20-30% longer for cassette organizers.
Then drain the tank, close the drain, fill with clean tap water without splashing. I use a tube and funnel or tube to faucet connection.
Cover and run for one minute to help rinse interior spaces. Drain, and repeat if needed. When it runs clear, uncover and allow to air dry.
Inspection follows under a magnifying lamp.
The basket full can now be placed directly in a large autoclave like the StatClave or Bravo and sterilized unwrapped in bulk, or packaged to preserve sterility and provide for safe storage.
- I unload the cassette organizers directly into the Statim for speed and convenience.
When unwrapped items are sterilized, they can be stored in clean, airtight containers away from light and heat. That way the cassette organizers are prepared as kits for you, and you can add the single use items you require — nonwoven gauze, needle, connection, needle blanks — along with the jewelry and chemical indicator.
Automated instrument washer (HYDRIM)
- How to get rid of your “dirty room”, reduce your personal risk, and save space.
- The Hydrim eliminates the need to pre-soak, hand scrub or ultrasonic clean instruments.
- A new, automated method of washing instruments that ensures these are thoroughly cleaned, free of debris and ready for effective sterilization.
- The unit is organized with baskets for loose instruments, special holders for hollow instruments and racks for instrument management cassettes of most sizes.
- This can also be used to thoroughly prepare new single use instruments and jewelry for sterilization (for studios who do not reprocess contaminated instruments).
Sterilization
STATIM Autoclaves
Advantages
- Active air removal
- Closed chamber drying
- Built in record keeping devices, storage device, network connection or printer.
- Aseptic transport: the entire contents of the chamber can be transported sterile to another area for use or storage.
- Use the inside of the cassette or containers for a sterile field and work surfaces.
- Dental bibs and CSR wrap are not needed.
- Sterilize more with less packaging.
- Cut down on waste, expenses, and spoilage of packages
- Sterilize wrapped and unwrapped items as needed
- Keep less wrapped instruments prepared.
- Mix loads to include wrapped jewelery for customers to take away.
- Sterilize wrapped items for stock faster than with a larger autoclave.
- The commonest jewelry items (plus extra balls, ends, O-rings, etc.)
- Extra needles and tapers
- Larger or heavier items that take a longer than a few minutes to cool off
- Prepared packages for appointments.
- A fully valid wrapped sterilization cycle: 14 minutes from start to sterile.
- Sterilize unwrapped just what you need for each piercing procedure, including the jewelry and everything else before the customer is done with paperwork and aftercare.
- Reduce duplicate stock and increase turnover
- Even the first cycle is only 6 minutes in the 2000 or 900, 9” in the 5000 and 12” in the 7000.
- Sterilize up to four or more procedure setup trays for immediate use at once with containers
Note: SciCan recommends that you run a wrapped cycle and let it run through the full dry cycle at the end of each workday. It serves to decontaminate, dry and recalibrate the STATIM. Whether you run it full or empty is up to you. I use that last calibration cycle to run my backup stock.


These standards are still current and reviewed as of December 6, 2013. The Statim currently meets all these CDC requirements.
Sterilization of Unwrapped Instruments. An unwrapped cycle (sometimes called flash sterilization) is a method for sterilizing unwrapped patient-care items for immediate use. The time required for unwrapped sterilization cycles depends on the type of sterilizer and the type of item (i.e., porous or nonporous) to be sterilized (243). The unwrapped cycle in tabletop sterilizers is preprogrammed by the manufacturer to a specific time and temperature setting and can include a drying phase at the end to produce a dry instrument with much of the heat dissipated. If the drying phase requirements are unclear, the operation manual or manufacturer of the sterilizer should be consulted. If the unwrapped sterilization cycle in a steam sterilizer does not include a drying phase, or has only a minimal drying phase, items retrieved from the sterilizer will be hot and wet, making aseptic transport to the point of use more difficult. [Not an issue for items contained in the closed STATIM cassette] For dry-heat and chemical-vapor sterilizers, a drying phase is not required.
Unwrapped sterilization should be used only under certain conditions:
1) thorough cleaning and drying of instruments precedes the unwrapped sterilization cycle;
2) mechanical monitors are checked and chemical indicators used for each cycle;
3) care is taken to avoid thermal injury to DHCP or patients; and
4) items are transported aseptically to the point of use to maintain sterility (134,258,262). Because all implantable devices should be quarantined after sterilization until the results of biological monitoring are known, unwrapped or flash sterilization of implantable items is not recommended (134).
Critical instruments sterilized unwrapped should be transferred immediately by using aseptic technique, from the sterilizer to the actual point of use. Critical instruments should not be stored unwrapped (260). Semicritical instruments that are sterilized unwrapped on a tray or in a container system should be used immediately or within a short time. When sterile items are open to the air, they will eventually become contaminated. Storage, even temporary, of unwrapped semicritical instruments is discouraged because it permits exposure to dust, airborne organisms, and other unnecessary contamination before use on a patient (260). A carefully written protocol for minimizing the risk of contaminating unwrapped instruments should be prepared and followed (260).
E. Sterilization of Unwrapped Instruments
1. Clean and dry instruments before the unwrapped sterilization cycle (IB) (248).
https://www.cdc.gov/mmwr/preview/mmwrhtml/rr5217a1.htm
2. Use mechanical and chemical indicators for each unwrapped sterilization cycle (i.e., place an internal chemical indicator among the instruments or items to be sterilized) (IB) (243,258).
3. Allow unwrapped instruments to dry and cool in the sterilizer before they are handled to avoid contamination and thermal injury (II) (260).
4. Semicritical instruments that will be used immediately or within a short time can be sterilized unwrapped on a tray or in a container system, provided that the instruments are handled aseptically during removal from the sterilizer and transport to the point of use (II). [Quoted on the SciCan flyer above.]
5. Critical instruments intended for immediate reuse can be sterilized unwrapped if the instruments are maintained sterile during removal from the sterilizer and transport to the point of use (e.g., transported in a sterile covered container) (IB) (258).
[The Statim cassette maintains sterility for transport.]
6. Do not sterilize implantable devices unwrapped (IB) (243,247).
7. Do not store critical instruments unwrapped (IB) (248).
The CDC system for categorizing recommendations is defined in the following Rankings:
Category IA. Strongly recommended for implementation and strongly supported by well-designed experimental, clinical, or epidemiologic studies.
Category IB. Strongly recommended for implementation and supported by some experimental, clinical, or epidemiologic studies, and by a strong theoretical rationale.
Category IC. Required by state or federal regulations. Because of state differences, readers should not assume that the absence of an IC recommendation implies the absence of state regulations.
Category II. Suggested for implementation and supported by suggestive clinical or epidemiologic studies or by a theoretical rationale.
No recommendation. Unresolved issue. These include practices for which insufficient evidence or no consensus exists regarding efficacy.
Whats the capacity?
| Cassette Internal Dimensions | 2000: L 11″ x W 7″ x H 1.5″ (L 280mm x W 180mm x H 35mm) 5000: L 15″ x W 7″ x H 3″ (L 380mm x W 180mm x H 75mm) 7000: L13.7″ x W 8.6″ x H2.5″ (L 34.7cm x W 21.9 cm x H 6.4 cm) |

Think of the 2000 as one large tray of equipment, and the 5000 as two very large trays of equipment, and the 7000 is made for even more wrapped items, to replace a larger chamber autoclave.
Need something larger? BRAVO and StatClave Class B vacuum autoclaves

If you want to sterilize more wrapped items in a more conventional way, consider a larger Class B fractionated vacuum autoclave such as BRAVO and StatClave. Class B cycles are meant for all types of loads, and use a pump to remove air from the chamber before the sterilization cycle and residual steam after to dry packages.
Questions and Answers
Do I need a second autoclave if I work with a STATIM?
No. All of the STATIM models provide fully validated sterilization legal in over 100 countries. Models 2000 and larger also sterilize and dry wrapped items. We do recommend a second STATIM for backup and rollover for busy studios, and a StatClave or Bravo for very busy studios who prefer to have a large packaged stock.
Can I sterilize equipment in a STATIM before cleaning it?
No. If it’s not clean, it can’t be sterilized! Process instruments before sterilization.
Is the HYDRIM good for cleaning tubes and tattoo equipment?
Yes. Single use sterile equipment is safest, but HYDRIM has been shown to be as good as hand scrubbing and an ultrasonic combined, and more consistent.
- Tubes should be disassembled and processed in a cassette rack or vertical instrument rack for proper flow and drainage.
- The cannula post adapter is not necessary because of the short length and uncomplicated design of disassembled tattoo equipment. (It was designed for dental turbines with gears.)
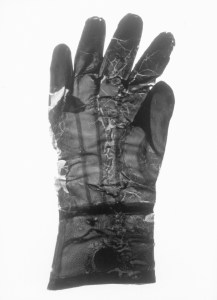
Can I sterilize gloves?
Historically, gloves have been sterilized by steam or gamma radiation.
since their inception
- Can it be done?
- Utility gloves (thick rubber) can be washed and sterilized
- Exam gloves (powder free) can be sterilized
- Surgeons gloves can be, but are now only available sterile
“Surgeon’s gloves should be sterile when offered for sale to end users, such as hospitals, clinics, and surgeons. FDA has not cleared any 510(k)’s for non-sterile surgeon’s gloves.” — FDA Medical Glove Guidance Manual
https://www.fda.gov/MedicalDevices/DeviceRegulationandGuidance/GuidanceDocuments/ucm073111.htm#3
- Is it appropriate?
- Utility gloves are intended for reuse
- Exam and surgical gloves are not intended for reuse
- Cleanroom and industrial gloves are not necessarily appropriate for client procedures
- What are the risks?
- Inadequate penetration by steam sterilization
- Inability to remove biomass, processing chemicals, and particulate matter could impede sterilization
- N cycle autoclave can not penetrate wrapped gloves reliably
- STATIM, StatClave and Bravo autoclaves penetrate (unless the gloves are too tightly folded or wrapped without room for circulation of steam)
- Loss of glove integrity when overheated
- Latex proteins could be denatured resulting in pinholes and other damage
- Vulcanization softening resulting in tears
- Nitrile has a working temperature range above that of the autoclave process
- Tacky gloves (complained about since the 1960’s, usually due to residues or damage to gloves)
- Loss of flexibility if not cooled adequately (not a problem with STATIM)
- Inadequate penetration by steam sterilization
- What are the alternatives?
- Sterile Pairs
- Sterile Singles
Utility gloves
Yes, they can be reprocessed, but is the risk worth the benefit?
Opinion: An all disposable process is safest.
CDC recommends people use heavier reusable gloves instead of thin disposable gloves for instrument processing to avoid injury.
“Personnel working in the decontamination area should wear household-cleaning-type rubber or plastic gloves when handling or cleaning contaminated instruments and devices.”
— CDC Guideline for Disinfection and Sterilization in Healthcare Facilities, 2008 https://www.cdc.gov/hicpac/Disinfection_Sterilization/13_11sterilizingPractices.html
In this case, Statim can be used to sterilize such heavy duty nitrile and silicone rubber utility gloves.
FDA specifies that this type of glove must meet the same requirements as exam gloves if used for contaminated surfaces and items.
Cleaning Gloves. FDA does not regulate gloves that are used for routine janitorial functions in medical facilities. However, gloves that are used for cleaning patients, or cleaning or handling surfaces or items contaminated with patient waste or fluids are medical gloves and should meet the requirements for patient examination gloves.
Utility, industrial, or general purpose gloves are used for tasks that do not involve contact with patients or body fluids. Therefore, FDA does not regulate them as medical devices. It is illegal for manufacturers to relabel these gloves for medical use or to imply in their labeling that the gloves are suitable for medical use. Labeling of utility, industrial, and general purpose gloves should not, in any way, represent or suggest that they may be used for medical purposes. This may include the brand name and company name.”
FDA Medical Glove Guidance Manual https://www.fda.gov/MedicalDevices/DeviceRegulationandGuidance/GuidanceDocuments/ucm073111.htm#1
It seems dangerous to reuse any kind of gloves, though this practice is still common in facilities with limited resources as described by Johns Hopkins University: https://www.reproline.jhu.edu/english/4morerh/4ip/IP_manual/ipmanual.htm
Some of the risks were calculated by the FDA Office of Science and Technology:
“Calculation of Virus Transport through Barriers as a Function of Pore Geometry
When stressed during use, synthetic barriers such as surgical gloves can develop tears that are undetectable by the user. While post-operation tests can detect the presence of holes in the glove, they provide little information regarding how much virus may have been transmitted during use. OST scientists employed a mathematical model to predict levels of virus transmission through a compromised barrier as a function of pore geometry and trans-membrane pressure. It was found that during conditions modeling the manipulation of surgical instruments, up to 300 hepatitis B viruses per second are transmitted through a slit 1 micron high and 4 microns wide. The calculations help CDRH to meaningfully quantify the risk associated with barrier failure.”
FDA OFFICE OF SCIENCE AND TECHNOLOGY Annual Report Fiscal Year 2000 https://www.fda.gov/downloads/AboutFDA/CentersOffices/CDRH/CDRHReports/ucm126862. pdf
Exam gloves
I hope to present a balanced view of the debatable points and opinions. What I would like to do is to discuss the issue with you so that those who are sterilizing gloves have a clear rational explanation of what risks are involved.
Latex and other types of exam gloves and surgeons gloves have been sterilized by moist heat in hospitals since at least as early as 1894, starting at Johns Hopkins Hospital. Many facilities with limited resources continue this practice. Some glove materials are damaged by autoclave temperatures such as vinyl and polyethylene.
We should never wash and reuse exam gloves or surgical gloves.
“Gloves should never be washed, disinfected or autoclaved unless specifically recommended by the manufacturer. As explained by OSHA, “Washing with disinfecting agents may cause deterioration of the glove material and may encourage “wicking” or enhanced penetration of liquids into the glove via undetected pores thereby transporting potentially infectious materials into contact with the hand.” – (OSHA instruction CPL 2-2.44C)”
APP Procedure Manual 2013, page 8
OSHA says we should not wash and disinfect gloves, though on the other hand CDC recommends to use thicker utility gloves for instrument processing, and to wash and autoclave them for reuse. The STATIM is labeled, tested and approved for such glove sterilization.
FDA refers to sterilization of gloves in the context of a product for sale, rather than for immediate use in house.
“Sterilization of medical gloves should meet a sterility assurance level (SAL) of 10 6. This means that you should design the sterilization process so that the probability of a glove being non-sterile is 1 in 1,000,000, even if the gloves originally contained highly resistant microorganisms.
You should sterilize medical gloves with a validated sterilization process. Note that some glove materials are adversely affected by certain sterilization methods. Validation of the sterilization method should demonstrate that the sterilization process does not adversely affect glove safety and effectiveness.”
— FDA – Medical Glove Guidance Manual https://www.fda.gov/MedicalDevices/DeviceRegulationandGuidance/GuidanceDocuments/ucm073111.htm#8l
Opinions on glove sterilization

- Prepared sterile gloves are unarguably the best choice. There are good reasons to use them for third party accountability, convenience, speed and customer safety.
- I prefer to simply buy sterile nitrile or polyisoprene gloves for procedures.
- I am not against sterilizing gloves in the STATIM for skin preparation and minor customer contact such as jewelry changes.
- Many powder free exam gloves can be effectively sterilized, however some experimentation should be done with the cuff folding and setup to determine optimal dry results, and SysTM cassette organizers make a significant difference to contain gloves in this way.
- When loading rubber and plastic instruments in the tray, leave a space between the instruments and the cassette walls. This ensures that steam reaches all surfaces, and will promote drying. — SciCan
- If you do sterilize new, clean gloves, they will appear fine, but may not be completely sterilized if they are not cleaned thoroughly immediately before sterilization.
- I have sterilized thousands of exam gloves without detecting problems of vulcanization, leakage, pinholes or tearing.
- My main concern is the residues on the surface of the gloves, that could result in irritation, infection and scarring.
- The cleaning methods used to process and prepare the surfaces of powder-free gloves are not the same for regular versus sterile surgeons gloves.
- There should be lower biomass and endotoxin and pyrogen residues on these gloves, but not as significantly reduced as required for sterile gloves, though processing standards vary by manufacturer.
- Microbial growth occurs on gloves in their boxes.
- The myth that exam gloves come “factory sterile” is untrue.
- There are evidence based biological and physical reasons why they have an expiration date.
“Standards proposed by the US Food and Drug Administration (FDA) for medical devices limit the endotoxin level to less than 20 EU/device19, and thus surgical gloves have to be made sufficiently clean to meet the specifications. This is the level required of medical devices that come in contact with blood or lymph circulating in a patient, although the device limit for cerebrospinal fluid is more stringent (2.15 EU).”
“CONCLUSION We observed that the endotoxin contamination of commercially-available sterile NR latex surgical gloves from the same lots were quite variable between brands in having low to intermediate concentrations of endotoxin activity. With some exceptions, most of these surgical gloves had levels below the FDA specified standards of <20 EU/device. In contrast, most of the non-sterile NR latex examination gloves were highly contaminated, with a higher percentage exceeding the specified detectable level.”
Journal of Rubber Research An assessment of endotoxins contents of nr latex medical gloves

APP Procedure Manual suggestions
STERILE GLOVES
Piercers may choose to use sterile gloves during piercing procedures; some are required to do so by state or local laws. Where the issue is not dictated by law, a piercer should make a research-based decision about the use of sterile gloves in their practice. Using sterile gloves is not a requirement for APP membership, though piercers can choose to go beyond the established minimum guidelines.
Donning Sterile Gloves
Piercers should use the “open donning” method. The (right-handed) technique is as follows:
1. Pick up the cuff of the right glove with your left hand. Slide the right hand into the glove until you have a snug fit over the thumb joint and knuckles. Your bare left hand should touch only the folded cuff, as the rest of the glove is sterile. Do not use your bare hand to adjust the fit.
2. Slide your right fingertips into the folded cuff of the left glove. Pull out the glove and fit your right hand into it.
3. Unfold the cuffs down over your wrists. Make sure your gloved fingertips do not touch your bare forearms or wrists.
APP Procedure Manual 2013, page 8
Conclusions
Though gloves can be sterilized successfully, they may not meet the same standards as commercially prepared sterile gloves. Prudence is advised to avoid problems with foreign matter, incomplete sterilization or an undesirable change of the gloves properties. The amount of effort and technical ability to process new gloves for sterilization may well exceed our capabilities.
I have found it to be more efficient to purchase prepared sterile gloves due to the cost / benefit ratio.
The relatively high cost of prepared sterile surgical gloves doesn’t necessarily qualify us to claim we have “limited resources” as described in Johns Hopkins University’s Jhpiego program.
— “Infection Prevention Guidelines for Healthcare Facilities with Limited Resources” https://www.reproline.jhu.edu/english/4morerh/4ip/IP_manual/C_Gloves.pdf
Pandemic shortages have made it necessary to revisit this option.


References
- PROCESSING SURGICAL GLOVES Appendix C_Gloves Johns Hopkins
- Steps of wrapping gloves for steam sterilization
- Glove disinfection, the risks, recommendations and regulations
Visit Statim.us for US sales and service
Visit Piercers.com for Canada+UK+EU sales and service

What is the difference between using the 3.5 minutes cycle and the 18 minutes cycle ? Is there a specific need for each ? Statim 2000 G4
The standard 3.5 minute cycles are the most appropriate for the daily needs of body piercing and tattoo studios, and provide sterilization for complex hollow and porous devices such as thin needles and jewelry with small blind lumens and gemstone settings with complex surfaces.
The longer cycles can be used where specified by regulatory requirements for reprocessing devices with potential prion protein exposure, and according to manufacturer’s instructions for processing of certain specialized surgical instruments.
Great article!!! Thanks Brian
Thanks for reading! Please let me know if you have any insights or questions!
Can we run metal under rubber and plastics cycle and consider it sterilized?
The lower temperature of the rubber and plastic cycle (121C) provides validated sterilization for appropriate loads, if they are heat sensitive. Metal instruments should not be heat sensitive, thus should be sterilized with the unwrapped or wrapped programs, if they are not mixed with other sensitive items.
Did you anticipate to process a mixed load including rubber or plastic and metal? If so, that should be acceptable.
Hello, I would like to apologize to all for my English if it's not good enough. I have read the above and would like to realize yourself a couple of questions.
You say that the closed cassette maintains sterile instruments for 1 h then could not sterilize something in the morning and evening use, does the use would not be right?
If for example I place several dental handpieces use a cassette, the first time I open it, okay sterility is lost for the rest of the pieces ?. Thank you.
Only wrapped items processed on a wrapped cycle and fully dried are meant to be stored for any period of time. The Statim cassette will maintain sterility for its contents indefinitely as long as it is still engaged in the unit, after completing a successful sterilization cycle. Once the cassette is removed, it is meant to be used for aseptic transport to the procedure site for immediate use of the sterilized contents.
Correct, the first time you open the cassette, there is a potential for you to contaminate the contents. You should run another sterilization cycle if you wanted to use the other unused, untouched items.
Does it matter if the wrapped instruments in autoclaveable bags are facing up or down?
Yes, your operator manual specifies plastic side up, as shown for appropriate drying.
Brian,
Can you please explain how the Statim 2000 complies with EU law / Class B equivalent. It seems to me you would need a Statim 2000S for this – correct?
The Statim (2000, 5000 and 7000) S Classic and G4 autoclaves are designed for full compliance with EN 13060 2004 and European laws. They are widely used for surgical, ophthalmology and dental equipment sterilization in over 100 countries, including all of Europe.
*The late model Statim 2202 made in 1993 and 1994 requires a PC board controller and measurement devices upgrade by the manufacturer to comply with the normatives.
More information is on my piercers.com site here https://piercers.com/
Avec plaisir :)
Thanks for the informations;-)
Bien sûr, François – Statim autoclaves (except the late model 2202 made in 1993/1994) meet and exceed the European Normative 13060 for small sterilizers, and they are sold and used in every country in Europe. In France, there are several dealers for medical and dental use, and also me for body art. A bit of interpretation is needed with French law to assure that regulators understand how it is employed appropriately for immediate use sterilization. I am working with the regulatory affairs department in Besançon for a NF protocol current with the medical and dental use.
Is it ok for Europe?